

The Perfect Sweater - The Cromwell Edit
Our dream sweater. It's the first thing we grab for when we want something warm, soft, and stylish. It's flatters our body type on a good day and it fits us even better on a bad day. A top-down raglan sweater is a great solution for our perfect sweater woes.
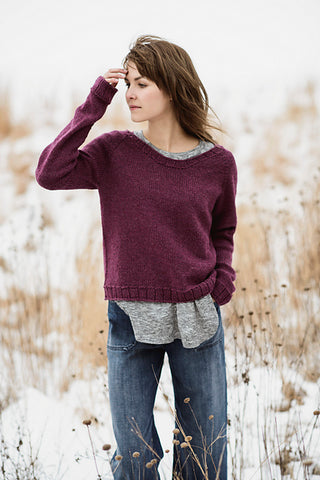
The Cromwell by Bobby Intveld is great option for a customizable knit. It's the comfy stylish sweater you can knit to make sure its fits YOU. Knit it longer, shorter, add shaping, knit the sleeves as long as needed, or add a high-low hem line. That's what I did. The entire sweater is knit in the round so I made it into a tunic that can we worn a top a tank, tee, or a button down. There is a band of ribbing on the bottom where I divided front from back and knit the back longer than the front. A faux seam can also be added once the sleeve stitches have been separated from the body of the sweater. Once the stitches have been cast one for the underarm section, place a marker for the center of each underarm as you knit down for the body. For example, I made the small size and I need to cast on 5 stitches after the sleeve separation. After the third stitch cast-on, I place a marker, cast on two more stitches, and knit to the next the underarm section and repeat. That third stitch (which has a marker placed right after it) denotes the side seam. The faux seam is compromised of a stitch that is slipped for two rows (Yes, its counter-intuitive but you don't knit it for two rounds) and knit on the third round. Not knitting this stitch creates an elongated stitch that adds a decorative seam, making the sweater look like the front and back were knit separately. You can also add a bit of waist shaping should you choose. As this sweater is knit top-down, I love being able to try on the sweater mid-knit to see how long the sweater is and where it hits me. This allows me to add decreases for waist shaping to create a little bit of form fitting. This can be done by using the same marker placement I used for creating the faux seam. You will knit to three stitches before the marker, knit two together (K2tog), knit one stitch, slip marker, knit one stitch, slip, slip, knit (SSK) and repeat on other side of under arm. Knit for about 4-6 rows and repeat waist shaping decreases as you see fit. As you go through the process, keep trying the sweater on to see where the decreases can be made for waist shaping. For my body type, my waist is smaller than my hips so after waist shaping, I needed to start adding increases for my hips. Since this was knit into a tunic, I increased 4 stitches every round every 4 rows (Increase one round and knit in stockinette for 4 rows). The method stayed the same as decreasing- Knit to one stitch before underarm seam, make one right, knit one stitch, slip marker, knit one stitch, make one left and repeat on other side of underarm. As the bottom ribbing was knit flat for the front and back, the increases help the garment flow and not be to form fitting.
And Voila! You're perfect sweater is customized to fit your style!
